Removing a stuck leaf spring shackle can be a frustrating yet essential task for maintaining your vehicle’s suspension system. Whether you’re tackling a restore project or performing routine maintenance, properly handling this component ensures your ride remains safe and comfortable. A common challenge many face is the accumulation of rust and debris, which can seize the shackle in place, making it seem almost impossible to remove. However, with the right techniques and tools, this task can become manageable. In this guide, we’ll explore effective methods for dislodging stubborn shackles, share valuable tips to make the process smoother, and highlight the importance of maintaining these components. If you’re eager to reclaim your vehicle’s performance and prevent further complications, read on to discover the best approaches to remove those stuck leaf spring shackles with confidence.
Understanding Leaf Spring Shackles: What You Need to Know
Understanding leaf spring shackles can be crucial for vehicle maintenance enthusiasts and professionals alike. These components play a pivotal role in the suspension system, acting as an intermediary between the leaf springs and the vehicle’s frame. Shackles allow the leaf springs to pivot, accommodating the movement of the suspension as the vehicle encounters bumps and uneven surfaces. Over time, however, exposure to elements like moisture, dirt, and rust can cause these shackles to become stuck, leading to potential ride quality issues and safety hazards.
A key aspect of leaf spring shackles is their construction, usually consisting of a durable metal design that can withstand significant stress. Yet, as they age, the bushings within these shackles may wear down or become damaged, further complicating their operation. This wear can lead to a host of problems, including clanking noises, reduced suspension efficiency, and uneven tire wear. Recognizing the symptoms of a failing shackle is essential, as timely intervention can prevent more extensive repairs down the line.
When dealing with stuck leaf spring shackles, understanding the identified causes can streamline the removal process. Common culprits include corrosion, which can effectively bind the metal components together, and dirt accumulation that jammed the mechanics. Additionally, improper installation or inadequate lubrication during maintenance can exacerbate these issues. Awareness of these factors will not only enhance your problem-solving efficiency but also guide you toward preventive measures to maintain the integrity of your vehicle’s suspension system.
When considering the removal of stuck shackles, it’s essential to approach the task with the right knowledge and tools. Various methods can be employed-ranging from simply using penetrating oils to apply heat for loosening stubborn components. Understanding these methods will empower you to handle repairs effectively and possibly avoid professional assistance, thereby saving both time and costs in vehicle maintenance.
Common Causes of Sticking Leaf Spring Shackles

The challenges of maintaining older vehicles or those exposed to harsh driving conditions often lead to one frustrating issue: stuck leaf spring shackles. These essential components, which allow leaf springs to pivot and absorb shocks while driving, can become immobilized due to several factors. Understanding these causes can not only ease the removal process but also help prevent future occurrences.
A primary factor contributing to stuck shackles is corrosion, a common enemy for any metal part exposed to moisture and grime. When rust sets in, it effectively binds the mechanical components together, creating a stubborn grip that resists typical removal methods. Leaving dirt and debris in and around the shackles can further exacerbate this issue, as these particles can lock into crevices and limit the shackles’ movement. Over time, this accumulation can become compacted, turning a minor annoyance into a significant obstacle.
Another significant cause is improper installation or maintenance practices that neglect lubrication. Adequate lubrication is crucial; without it, the bushings within the shackles wear out prematurely, leading to binding and increased friction. This situation is particularly prevalent if the vehicle undergoes frequent heavy-duty use or if the shackles were not appropriately greased during installation. Such neglect can escalate to a point where the shackles are nearly impossible to detach without specialized intervention.
Lastly, exposure to harsh conditions-such as those encountered in off-roading or in areas with extreme weather fluctuations-can accelerate wear and tear. These environments not only promote rust and corrosion but also introduce additional stress to the components, causing them to seize up more quickly than they would under normal driving conditions. Regular inspections and maintenance are key to catching these issues before they become unmanageable.
Identifying these common causes allows vehicle owners and enthusiasts to take preventive measures and employ effective strategies for dealing with stuck leaf spring shackles. By prioritizing regular maintenance, lubrication, and careful installation practices, you can ensure that these crucial suspension components remain functional and responsive for the long haul.
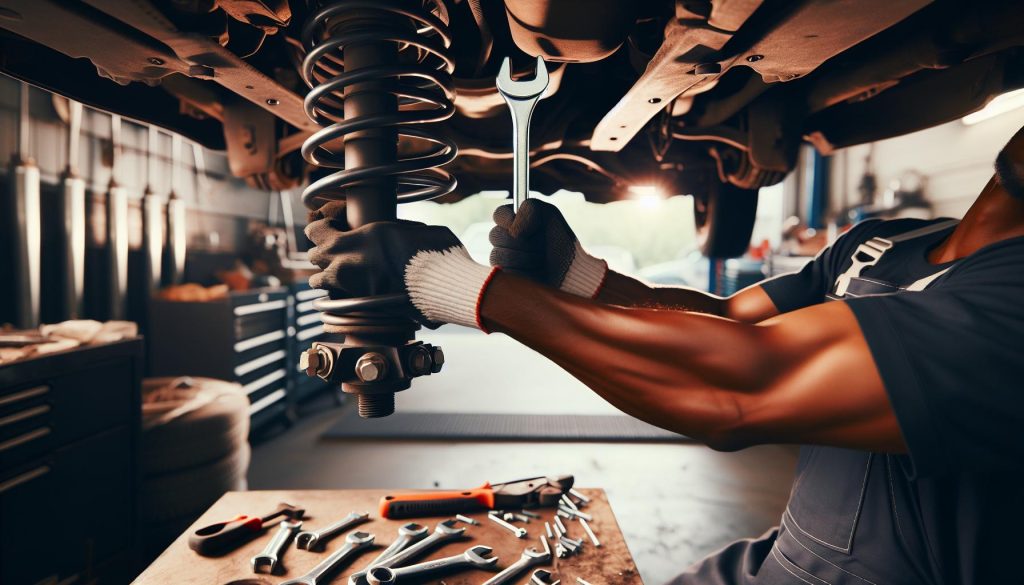
Essential Tools for Removing Stuck Shackles

Dealing with stuck leaf spring shackles can be one of the more challenging tasks for vehicle maintenance enthusiasts. To navigate this frustrating scenario effectively, having the right tools on hand is critical. Not only can the proper equipment save time, but it can also prevent damage to the vehicle, ensuring a smoother removal process.
Essential tools for tackling stuck shackles typically include:
- Socket Set: A complete socket set is vital, particularly one that includes sockets sized specifically for the type of shackles on your vehicle. Working with the correct size prevents stripping and damage to the shackle bolts.
- Impact Wrench: For those stubborn bolts, an impact wrench can provide the necessary power. It delivers high-torque output that can easily break the grip of rust and corrosion.
- Leaf Spring Shackle Remover Tool: Specialty tools, like a leaf spring shackle pin remover, are designed for this exact job. These tools often feature a mechanism that allows for the extraction of the shackle pins even in tight spaces.
- PB Blaster or Rust Penetrating Oil: Applying a penetrating oil to the seized area can significantly enhance your chances of loosening the shackles. It works by seeping into the corroded parts and breaking down the rust bond.
- Torque Wrench: When reinstalling shackles, a torque wrench ensures that you tighten the bolts to the manufacturer’s specifications, preventing future issues.
Equipping yourself with these essential tools not only streamlines the process of removing stuck leaf spring shackles but also enhances your confidence in achieving the task safely and effectively. Proper preparation can mean the difference between a frustrating afternoon in the garage and a successful resolution to your suspension woes.
Step-by-Step Guide to Remove Stuck Leaf Spring Shackles

Dealing with stuck leaf spring shackles can be a frustrating endeavor, especially if you’re eager to get back on the road or complete your project properly. However, with the right approach, you can efficiently tackle this problem and avoid unnecessary complications. Follow this step-by-step guide to successfully remove stubborn shackles from your vehicle.
Start by gathering your tools. You’ll need a socket set, an impact wrench, and some penetrating oil like PB Blaster. Begin by applying the penetrating oil generously to the bolts and let it soak for at least 15-30 minutes. This allows the oil to seep into any rust or corrosion that may be binding the shackle bolts.
Next, ensure that your vehicle is safely supported with jack stands. Use an impact wrench to try and break the initial grip of the bolts. If the bolts are particularly stubborn, tap the bolts gently with a hammer to provide some shock and help loosen them. If they still don’t budge, consider using a leaf spring shackle removal tool for better leverage. This tool is specifically designed for this task and can help you extract the pins more easily.
Once the bolts are loosened, continue unscrewing them by hand. If you encounter resistance, reapply penetrating oil and let it sit for a bit longer. After removing the bolts, inspect the shackles and bushings for any damage. Replace them as necessary before reinstallation, ensuring to follow your vehicle’s torque specifications when tightening new bolts. Taking these careful steps not only makes the process less daunting but also ensures that your suspension components remain in good condition for a smoother ride ahead.
Best Techniques for Loosening Stubborn Shackles
When confronted with stubborn leaf spring shackles, employing the right techniques can make all the difference. Many vehicle owners underestimate the power of a few simple methods that can effectively loosen those rusted or jammed shackles. A good starting point is the application of penetrating oil. This solution, such as PB Blaster or Liquid Wrench, is highly effective for reaching into tight spaces and dissolving rust. Once applied, allow it to soak in for at least 15 to 30 minutes, or even longer if the shackles are particularly stubborn. This simple act can significantly reduce the friction keeping the shackles in place.
Another beneficial approach is to alternately apply heat to the area surrounding the shackles. Using a propane torch cautiously, heat the bolts and surrounding metal can expand the materials and break loose any rust or corrosion binding them together. Be careful to avoid overheating any components that could be damaged or igniting any flammable materials.
Additionally, utilizing mechanical advantage through the right tools can greatly aid in loosening shackles. A leaf spring shackle removal tool is designed specifically for this task; it can provide the leverage necessary to break the shackles free without risking damage to your vehicle. If you don’t have access to such a tool, a long breaker bar or a cheater pipe can be used to increase your leverage on standard wrenches and sockets.
Lastly, patience is key. If a bolt remains resistant, returning to it after allowing the penetrating oil additional time to work or after reapplying heat can yield better results. Employing these techniques collectively not only enhances the chances of success but also contributes to a smoother and more efficient removal process. These steps can save time and frustration, ensuring you get back on the road without unnecessary delays.
Safety Precautions When Working with Leaf Springs
When handling stubborn leaf spring shackles, safety should be your top priority. The process of removing these components can sometimes entail significant risks, especially when dealing with rusted or frozen parts, power tools, or heat sources. Understanding basic safety precautions not only protects you but also ensures a smoother workflow.
Begin by wearing appropriate personal protective equipment (PPE). This includes safety goggles to protect your eyes from flying rust or debris, heavy-duty gloves to prevent cuts or scrapes, and steel-toed boots to shield your feet from heavy tools or components that may fall. If you’ll be using penetrating oils or heat, a mask or respirator may also be beneficial to avoid inhaling harmful fumes.
Additionally, always work in a well-ventilated area. Many penetrating oils contain chemicals that can be hazardous when inhaled, so ensure that your workspace is adequately ventilated to prevent the buildup of toxic fumes. When using a propane torch to apply heat, be mindful of the surrounding environment. Remove any flammable materials nearby and have a fire extinguisher on hand. It’s crucial to keep a clean workspace to reduce the risk of accidents caused by clutter or unorganized tools.
Before beginning the removal process, it’s essential to secure the vehicle adequately. Use jack stands, never relying solely on a hydraulic jack, to elevate the vehicle safely. Ensure the area is level, and the vehicle is stable to avoid any unintentional movement while you work. By taking the time to prepare your workspace and applying these safety measures, you can significantly reduce risks and enjoy a more efficient repair process.
When to Seek Professional Help for Stuck Shackles
Dealing with stuck leaf spring shackles can be a true test of your mechanical skills and patience. However, knowing when to call in a professional can save you time, frustration, and potential damage to your vehicle. If your attempts to remove the shackles involve excessive force, unreliable tools, or you find yourself facing a situation that feels beyond your expertise, it may be time to seek help.
When the bolts or shackles are severely rusted or corroded, DIY methods may lead to stripping threads or breaking bolts, which can complicate the repair further. A professional mechanic has access to specialized tools and techniques designed specifically for these tough scenarios. If you find that penetrating oil or heat isn’t doing the trick even after multiple applications, or if you feel uncomfortable applying heat due to safety concerns, professional assistance is advisable.
Another key indicator is if safety becomes a concern. If your vehicle isn’t adequately secured, or if you’re unsure about employing heat sources like a torch around flammable materials, it’s smart to consult with a professional. Mechanics also have experience handling complex situations that could arise from rusted shackles, such as suspension and alignment issues, which might be overlooked in an at-home repair.
Ultimately, don’t hesitate to go for professional help if the challenge of removing stuck shackles begins to outweigh the benefits of a DIY project. Protecting both yourself and your vehicle should always come first, and sometimes bringing in a skilled technician is the best way to achieve that goal efficiently and safely.
Preventative Maintenance Tips for Leaf Spring Shackles
Maintaining your leaf spring shackles is crucial for ensuring the longevity and performance of your vehicle’s suspension system. Regular maintenance can prevent the shackles from becoming stuck due to rust and corrosion, saving you from the frustration of dealing with stuck components. One effective method is to regularly inspect your leaf spring shackles for any signs of wear or damage. If you notice any cracks, rust, or other deterioration, addressing these issues early can help avoid more significant repairs down the road.
Applying a good-quality penetrating oil to the shackles periodically can work wonders in preventing them from seizing. When performing routine checks, spray the penetrating oil onto the shackles and allow it to soak in. This not only helps lubricate the mechanism but also inhibits rust formation. It’s wise to do this during seasonal maintenance, particularly before and after winter months when road salt can promote corrosion.
Keeping Components Clean
Dirt and debris can accumulate around the leaf spring shackles, contributing to moisture retention and further rusting. Therefore, keeping the suspension parts clean is essential. Regular washing of the undercarriage, especially after driving on unpaved roads or through wet conditions, can prevent rust. Consider using a pressure washer to remove any stubborn mud and residue. Following this, a light coating of grease on the shackles can create a barrier against moisture and dirt.
Regular Inspections
Investing time in regular inspections will pay off in the long run. Every few thousand miles, take a moment to visually inspect your leaf spring shackles. Look for any signs of unusual wear, such as excessive movement or strange noises while driving, which may indicate issues with the shackles or surrounding suspension components. Early detection of problems can lead to simpler fixes, lowering the risk of being faced with a stuck shackle situation in the future.
Incorporating these preventative maintenance practices into your vehicle care routine not only protects your leaf spring shackles but also enhances the overall safety and performance of your suspension system. By staying proactive, you can avoid the headache of stubborn shackles and ensure a smoother ride for years to come.
Alternative Solutions for Stuck Shackles: What Works
When faced with stuck leaf spring shackles, frustration can quickly mount, but various alternative solutions can help ease the situation. Creative approaches often make a significant difference, especially when the typical methods fail. One powerful tool in your arsenal is heat application. By carefully heating the area around the shackles, you can cause slight expansion of the metal, which might be enough to free the stuck component. Be cautious when using heat, as excess temperature can damage surrounding parts-using a propane torch is generally effective, but direct flame should be avoided on plastics or rubbers.
Another effective method involves leveraging vibration to break the rust bond. A strong impact wrench or a hammer can work wonders; gently tap around the shackles to create vibrations that may loosen corrosion. Utilizing a rust penetrant can further aid this process-applying a well-recommended product like PB Blaster or WD-40-allow it to seep in, and then try the vibration technique again after letting it sit for a while. Combining heat and vibration techniques is often a winning strategy for tackling stuck shackles.
In some cases, you might want to consider using a puller tool specifically designed for shackles. This tool applies consistent pressure and can be adjusted for various sizes, effectively helping to shift stuck shackles without the risk of damaging them. A well-placed puller can often shift stubborn components that regular manual force fails to budge. Additionally, if rust is the main culprit, consider using electrolytic rust removal. This method involves immersing the part in a solution and using a battery to draw out the rust, providing an effective, chemical-free way to clean up the shackles.
Never underestimate the importance of patience and technique. Sometimes, walking away for a short break and then returning with a fresh perspective can yield surprising results. The goal should always be to minimize damage while maximizing effectiveness-taking a moment to assess the situation before applying force can provide better outcomes in the long run. Remember, if the situation becomes too complex or you feel uncertain, seeking professional help can save time and prevent potential damage to your vehicle.
FAQs About Leaf Spring Shackle Removal
When grappling with the challenge of removing stuck leaf spring shackles, many questions arise about effective techniques and best practices. Tackling these undermining issues often leads enthusiasts and DIY mechanics to seek guidance for avoiding costly mistakes and injuries during the process. Here are some frequently asked questions and insights to enhance your shackle removal experience.
What are the common symptoms of stuck leaf spring shackles?
Stuck leaf spring shackles can manifest through various symptoms, including excessive noise while driving, an unbalanced ride height, or a noticeable decrease in suspension performance. If your vehicle experiences slumping on one side, uneven tire wear, or instability during cornering, it may indicate that the shackles are stuck and require immediate attention.
What lubricants are best for loosening rusted shackles?
For breaking down rusted shackles, penetrating oils work wonders. Products like PB Blaster, WD-40, and Liquid Wrench are effective at penetrating rust and easing the removal process. It’s advisable to apply them generously, allowing enough time for the product to seep into the rust-laden threads before attempting any forceful removal.
Can heat be harmful when removing shackles?
Applying heat can be beneficial for loosening rusted shackles, but caution is essential. Overheating can lead to warping or damaging surrounding components. It’s best to apply heat gradually and avoid direct exposure to plastic or rubber parts, ensuring a safer, more controlled approach to loosening stubborn shackles.
What if traditional methods fail to free the shackles?
If conventional techniques like lubrication, heat application, and tapping have yielded no results, specialized tools such as a puller or an impact wrench can provide the additional force needed. In extreme cases, seeking the expertise of a professional mechanic is advisable. They possess the experience and tools required to handle stubborn shackles without causing further damage to your vehicle.
With these insights, you can approach the task of removing stuck leaf spring shackles with greater confidence. Remember, patience and careful assessment of the situation can often lead to successful outcomes without unnecessary complications.
Final Thoughts on Stuck Leaf Spring Shackles
When dealing with stubborn leaf spring shackles, it’s vital to remember that patience and strategic thinking can often make the difference between a successful DIY project and a frustrating encounter. A common misconception is that brute force will always do the job; however, this can lead to damage and additional work. Approaching the problem with care-using the right tools and techniques-can save both time and resources.
Preparation is key; assessing the condition of your shackles, lubricating them adequately, and allowing time for penetrating oils to work can all contribute to a smoother process. Utilizing a combination of heat and vibration can effectively break the seal of rust, but it should be done cautiously to avoid damaging surrounding components. If traditional methods fall short, don’t hesitate to explore alternative approaches such as using a shackle removal tool or consulting a professional mechanic who has dealt with similar issues extensively.
It’s also essential to think long term. Many mechanics recommend regular maintenance of leaf spring components to prevent future issues. Simple steps like applying lubricant periodically can go a long way in extending the life of your shackles and improving overall suspension performance. As you tackle stuck shackles, keep in mind that a proactive approach often proves to be the most effective in ensuring your vehicle’s successful operation on the road.
FAQ
Q: What are the common symptoms of a stuck leaf spring shackle?
A: Common symptoms of a stuck leaf spring shackle include creaking noises when the vehicle moves, uneven tire wear, and a noticeable drop in vehicle height. If you experience any of these signs, it may indicate that your shackles are stuck and need attention.
Q: How can I tell if my leaf spring shackle is rusted or just stuck?
A: To determine if your leaf spring shackle is rusted or simply stuck, inspect for visible rust or corrosion on the shackle and surrounding components. Rust will often appear as orange or brown spots. If the shackle is clean but still won’t budge, it may just be stuck and not rusted.
Q: What are some effective penetrating oils for loosening stuck shackles?
A: Effective penetrating oils for loosening stuck shackles include PB Blaster, WD-40, and Liquid Wrench. Apply the penetrating oil generously to the shackle area and let it sit for at least 15 minutes to penetrate and help break down rust and debris.
Q: Is heat a safe option for loosening a stuck leaf spring shackle?
A: Yes, applying heat can be a safe option for loosening a stuck leaf spring shackle if done carefully. A propane torch can help expand the metal, making it easier to remove. However, be cautious to avoid damaging nearby components and always use safety gear.
Q: When is it best to replace a stuck leaf spring shackle instead of trying to remove it?
A: If a stuck leaf spring shackle shows signs of severe rust, deformation, or damage, it’s best to replace it rather than attempt to remove it. Continuing to use a damaged shackle can compromise vehicle safety and performance.
Q: What step should I take if the shackle bolt is completely stripped?
A: If the shackle bolt is stripped, consider using a bolt extractor set to remove it. Alternatively, you may need to drill out the bolt carefully. If you’re unsure, seeking professional help might be the safest option.
Q: Can I use a socket wrench to remove a stuck leaf spring shackle?
A: Yes, a socket wrench is a common tool to remove a stuck leaf spring shackle. Ensure you have the correct socket size and apply pressure while using penetrating oil to increase your chances of success.
Q: Are there any risks in working with leaf spring components?
A: Yes, there are risks in working with leaf spring components, including the potential for injury if the components suddenly release. Always use appropriate safety gear, follow safety precautions, and consider consulting a professional if unsure about any steps.
In Retrospect
Now that you have the tools and techniques to effectively remove a stuck leaf spring shackle, don’t let any lingering doubts hold you back! This crucial step not only improves your vehicle’s performance but also ensures your safety on the road. For additional guidance, check out our articles on common suspension issues and DIY suspension repairs to further enhance your auto maintenance skills.
Ready to tackle your project? Subscribe to our newsletter for expert tips delivered right to your inbox, and stay updated on the latest DIY strategies. Don’t forget to share your experiences or any challenges you faced in the comments below-your insights could help fellow enthusiasts navigate their repairs too. Exploring further into the world of automotive maintenance can uncover many valuable solutions, so dive deeper and make your next project even more successful!