Removing a lawn mower blade may sound daunting, but knowing how to do it safely and efficiently can save you time and frustration. Did you know that a dull blade can lead to uneven cutting and damaged grass? In under 10 minutes, you can replace or sharpen your mower blade, enhancing your lawn’s health and appearance. This task is not only about maintenance; it’s about ensuring your lawn care routine runs smoothly and keeps your yard looking its best. Whether you’re a seasoned homeowner or new to lawn care, understanding the right techniques will empower you to tackle this essential chore with confidence. Read on to discover practical steps that will help you remove your lawn mower blade safely and quickly, so you can get back to enjoying your beautifully manicured lawn.
How to Choose the Right Tools for Blade Removal
Choosing the right tools for lawn mower blade removal can greatly enhance your efficiency and safety during maintenance sessions. With the right equipment at your disposal, you can tackle the task swiftly and with confidence, ensuring that your mower blades are replaced or cleaned as required. Essential tools include a wrench or socket set that matches the size of your blade bolts, as these are crucial for loosening and tightening the blades securely. For added leverage, consider using a breaker bar, which provides extra torque to remove stubborn bolts without excessive strain.
In addition to hand tools, a good-quality blade removal tool can streamline the process. These devices are specifically designed to hold the blade in place while you work, preventing any unnecessary movement that could lead to accidents or injuries. Moreover, having a pair of gloves and safety goggles is vital for your protection. Gloves will shield your hands from sharp edges, while goggles will protect your eyes from debris and potential splashes of dirt or oil.
Another useful addition to your toolkit is a magnetic tray or container. This practical accessory can help you keep track of small parts such as nuts, bolts, or other fasteners, ensuring that nothing goes missing during your blade removal process. By organizing your workspace and tools, you can focus more on the task at hand and less on searching for misplaced items. Overall, making these thoughtful choices in your tools can significantly improve not just the speed, but the safety and effectiveness of your lawn mower maintenance routine.
Safety Precautions Before Starting the Process
Proper safety precautions can mean the difference between a straightforward maintenance task and a trip to the emergency room. Removing lawn mower blades is a necessary aspect of upkeep for any lawn care enthusiast, but it comes with inherent risks if not approached with caution. Before diving into the task, understanding the surroundings and equipment can significantly minimize hazards.
To start, always ensure that the mower is powered down. For gas mowers, disconnect the spark plug wire to prevent any accidental ignition while you’re working. Electric mowers should be unplugged or the battery removed. Additionally, give the blades time to cool if the mower has been recently used, as they can remain hot for quite some time after operation. Wearing the right protective gear is non-negotiable; a pair of sturdy gloves will protect your hands from sharp blades and flying debris, while safety goggles will shield your eyes from dirt and metal fragments that may come loose during blade removal.
Creating a clear workspace is equally important. Ensure that the area where you will be working is free of clutter, and avoid any distractions that might draw your attention away from the task at hand. A well-organized space not only promotes efficiency but also reduces the chances of accidents. It’s wise to have tools easily accessible but also to make sure they are in good condition. For example, a clean wrench or socket ensures you won’t struggle with rusted or stuck components, which can lead to slips and injuries.
Finally, make a habit of conducting a quick safety check of your equipment before starting. Inspect the mower for any signs of wear or damage, especially around the blade area. If something seems off, it’s better to address it before proceeding with the task, as ignoring safety signs can lead to further complications down the road. These simple, yet crucial, steps create not only a safer environment but also lay the groundwork for a more efficient blade removal process.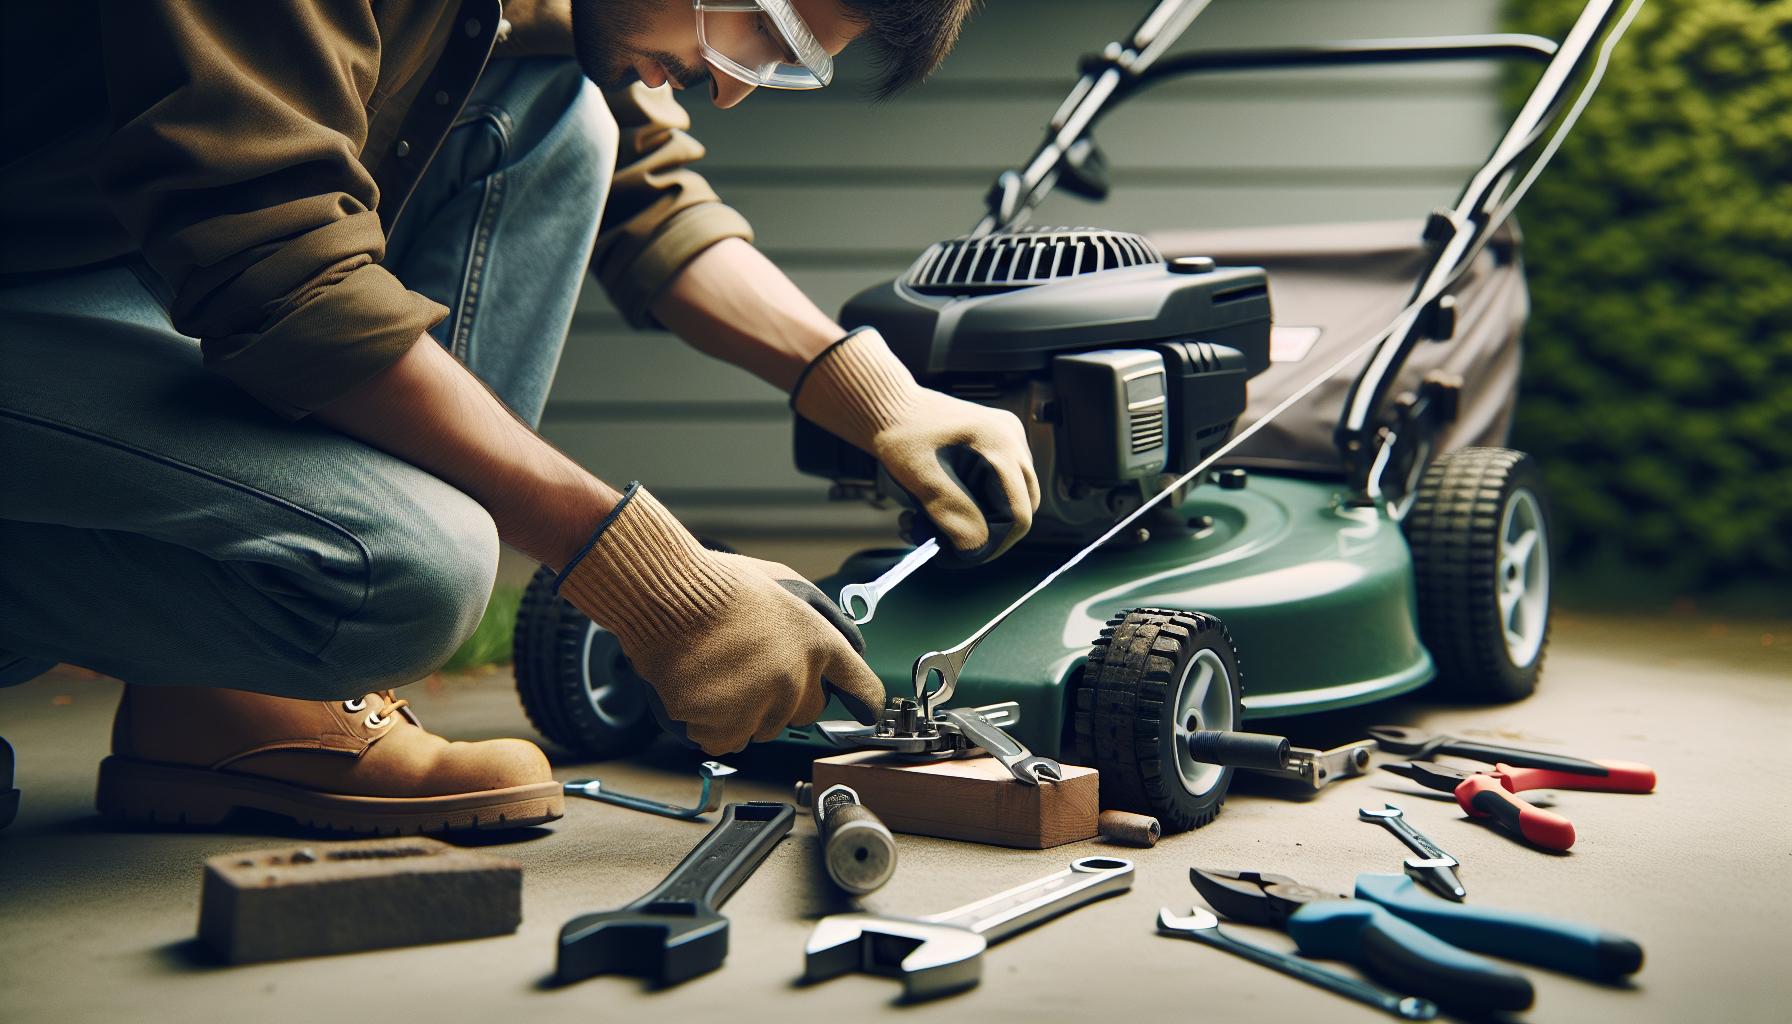
Step-by-Step Guide to Removing Lawn Mower Blades
The task of removing lawn mower blades may seem daunting at first, but with the right approach, you can accomplish it safely and efficiently-often in under 10 minutes. A well-maintained blade not only results in a cleaner cut but also contributes to the overall longevity of your mower. Let’s dive into a straightforward process that will enable you to tackle this essential maintenance task with confidence.
Begin by assembling your tools. You will need a socket wrench or a specialized lawn mower blade removal tool, a block of wood to secure the blade, and your safety gear, including gloves and goggles. Once you have everything ready, it’s time to prepare the mower itself. Position the mower on a flat surface to ensure stability, and if you have a gas mower, disconnect the spark plug wire to prevent accidental starts.
Step-by-Step Process
- Secure the Blade: Use the block of wood to jam against the blade, preventing it from spinning. This is crucial for maintaining control while you work.
- Loosen the Bolt: Locate the central bolt securing the blade to the mower. Using your socket wrench, turn the bolt counterclockwise to loosen it. Be cautious; some bolts may be tightly secured, which may require additional effort or a breaker bar for leverage.
- Remove the Blade: Once the bolt is loosened, remove it along with any washers present. Carefully lift the blade off the spindle. Take note of the blade’s orientation for easy reattachment later.
- Inspect and Clean: Before replacing the blade, take a moment to inspect it for damage, such as nicks or bends. Use a wire brush or a degreaser to clean any grass clippings or debris from the blade and mower deck, ensuring optimal performance upon reinstallation.
With these steps completed, you are well on your way to effectively managing your lawn mower’s maintenance. Remember, following this process not only enhances the performance of your mower but also promotes safety and efficiency during upkeep. Happy mowing!
Common Mistakes to Avoid When Removing Blades
When it comes to removing lawn mower blades, avoiding common pitfalls can make the difference between a smooth maintenance session and an infuriating ordeal. One of the most frequent mistakes is neglecting to properly secure the mower before starting. Failing to ensure the mower is on a stable surface and does not move can lead to injury or difficulty in loosening tight bolts. Make sure the mower is firmly in place and distress signals, like disconnecting the spark plug, are adhered to.
Another misstep is not using the right tools or attempting to improvise with unsuitable ones. A socket wrench is essential for loosening the blade’s central bolt, and using the wrong size can strip the bolt, complicating future blade changes. If you don’t have the correct equipment on hand, consider putting off the task until you do; working without the right tools can lead to frustration and additional wear on your equipment.
Additionally, many users overlook the importance of inspecting the blades before removal. Damage such as bends or nicks not only affect the blade’s performance but also safety during removal. Before you engage with the blade, take a moment to examine its condition-this can save you valuable time and effort later.
Finally, failing to note the orientation of the blade before removal is a common mistake that can lead to confusion when reattaching it. It’s advisable to take a quick photo or make a mental note of how everything fits together. This simple step ensures that you will securely reattach the blade in the correct position, promoting safer operation and better cutting performance. By being mindful of these common mistakes, you can streamline the process of removing your mower blades and enhance your overall lawn maintenance routine.
How to Clean and Maintain Mower Blades
Keeping your mower blades clean is crucial for achieving the best cutting performance and prolonging their lifespan. Regular maintenance not only ensures that your lawn mower operates efficiently but also leads to healthier grass by producing clean cuts that minimize damage to grass blades. By dedicating just a few moments after each mowing session to clean and maintain your mower blades, you can avoid buildup of grass, sap, and dirt that can dull the blades and lead to rust.
To start, always wear protective gloves when handling mower blades to safeguard against sharp edges. After removing the blades, use a stiff brush or a putty knife to scrape off any grass clippings or debris that may have accumulated. This manual cleaning is essential because leftover debris can harden and be much harder to remove later. For a deeper clean, you may want to use a pressure washer or garden hose spray, making sure to dry the blades thoroughly afterward to prevent rust formation.
Oiling the Blades is another important step in maintaining your lawn mower blades. After cleaning, apply a lightweight oil to the blades to protect them from corrosion. This creates a barrier against moisture and helps maintain sharpness. Remember to wipe off any excess oil to prevent it from attracting dust and dirt.
Additionally, it’s wise to routinely check the blade’s sharpness. Dull blades not only tear at the grass rather than cutting it cleanly but also require more power from the mower, leading to unnecessary fuel consumption and wear on the engine. Sharpening the blades at the beginning of each mowing season or after every 20-25 hours of use can keep them performing optimally.
By following these practical cleaning and maintenance steps, you ensure that your lawn mower blades remain in excellent condition throughout their use, making lawn care easier and more effective.
Understanding Different Types of Lawn Mower Blades
Choosing the right lawn mower blade is essential for maximizing efficiency and achieving the perfect cut on your grass. With a variety of blade types available, it’s vital to understand their designs and intended uses to ensure optimal performance from your mower. Whether you’re a homeowner looking to maintain your lawn or a professional landscaper managing larger spaces, knowledge of mower blade types can significantly enhance your cutting experience.
Lawn mower blades generally fall into three main categories: standard, mulching, and high-lift blades.
- Standard blades are the most common type, designed for general use. They are efficient for regular mowing and can handle most grass types without issues. These blades usually have a straightforward design, making them easy to install and replace.
- Mulching blades feature a unique shape with curved edges that help chop grass clippings into finer pieces. This design ensures that the clippings are scattered evenly back onto the lawn, returning nutrients to the soil and promoting healthier grass growth. If you prefer a lawn that requires less fertilization and more natural upkeep, mulching blades are an excellent choice.
- High-lift blades are ideal for taller grass or thicker lawns. These blades are designed with a pronounced lift that propels cut grass upward and outward, preventing clogging in the mower deck. This feature is particularly useful for those who endure heavy mowing sessions or deal with wilder grasses, as they ensure a clean cut and efficient grass discharge.
As you prepare for the task of blade removal, identifying which type of blade your mower uses can streamline the process. Each blade type requires specific handling and maintenance practices. For example, mulching blades might need more frequent sharpening due to their unique cutting action, while high-lift blades may require care to prevent damage from debris buildup. Understanding these distinctions allows you to approach your lawn maintenance tasks with confidence, ensuring that you can safely and effectively switch or remove blades in less than ten minutes.
In addition, some mowers may also utilize specialty blades designed for specific applications, like those used in tough terrains or for creating precise lawn patterns. Always refer to your mower’s manual for recommendations on blade types suited for your specific model, as compatibility can impact not only cutting performance but also your mower’s longevity.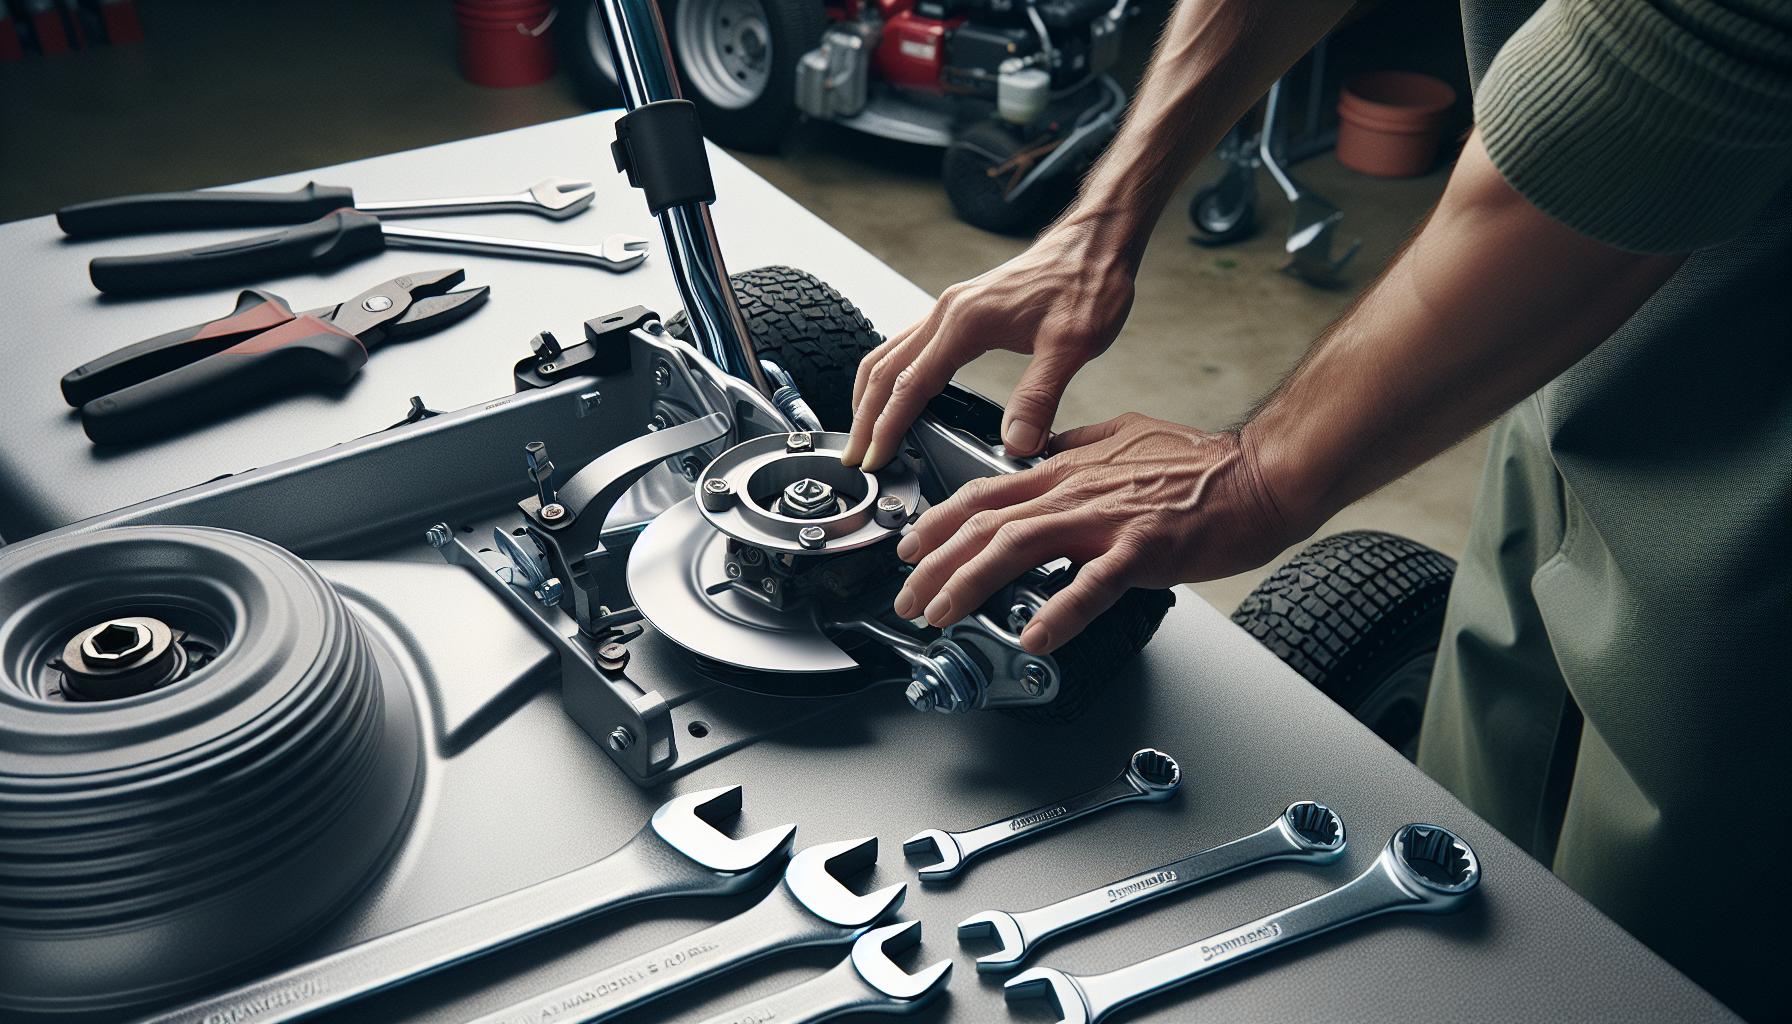
Tips for Reattaching Mower Blades Securely
Reattaching mower blades correctly is crucial for ensuring both the safety and efficiency of your lawn mower. A loose or improperly installed blade can lead to vibration, uneven cuts, and potentially dangerous malfunctions. Start by aligning the blade on the spindle, ensuring that the flat part of the blade’s mounting hole sits snugly against the corresponding flat surface of the spindle. This alignment is key to effective blade performance as it distributes the forces evenly, reducing wear and tear.
When securing the blade, using the right tools and techniques is essential. A torque wrench is highly recommended for tightening the bolts to the manufacturer’s specified torque settings. This tool helps prevent over-tightening, which can strip the threads, as well as under-tightening, which can lead to blade slippage during operation. Additionally, consider applying a small amount of anti-seize compound on the threads of the bolts to aid in future maintenance and prevent rust accumulation, allowing for easier removal and installation later.
Regularly checking the blade’s balance after reinstallation is essential for optimal mower performance. An unbalanced blade can cause unintended stress on the mower’s engine and lead to poor cutting performance. To check the balance, hang the blade vertically from a nail or hook; it should remain level. If one end dips lower than the other, it may need to be sharpened again or replaced, depending on the extent of wear.
Lastly, don’t forget to inspect and clean the blade area post-reattachment. Removing grass clippings and debris helps maintain the mower’s performance and prevents the buildup of rust and rot. This simple practice not only prolongs the lifespan of your blades but also enhances safety during mowing by ensuring that the blades operate as they are designed to. Always refer to your mower’s manual for specific guidance tailored to your model and blades, ensuring your mower remains in peak condition after blade reattachment.
Signs That Your Lawn Mower Blade Needs Replacement
Knowing when to replace your lawn mower blade can significantly affect the health of your lawn and the performance of your mower. A sharp blade is essential for achieving a clean cut, which promotes a healthier lawn by minimizing stress on the grass and helping prevent diseases. Here are critical signs that indicate it might be time to switch out your lawn mower blade for a new one.
First, examine the blade’s cutting edge. If you notice that it has become dull, chipped, or damaged, it is a clear indication for replacement. Dull blades tear grass instead of cutting it cleanly, leading to frayed edges that can make your lawn more susceptible to diseases. If your mower is leaving behind uncut patches or if your lawn appears uneven post-mowing, these can also signal a need for a blade replacement. A well-maintained blade should leave a tidy and uniform appearance across the lawn.
Moreover, pay attention to vibrations and unusual noises during operation. These may indicate that the blade is unbalanced or poorly secured. If you sense excessive vibration or hear knocking sounds, it may not solely point to a maintenance issue; it could be a sign that the blade itself is worn out and needs replacing. Additionally, make it a habit to inspect the blade regularly for rust or corrosion, which can weaken its structure and efficiency.
Lastly, frequent need for sharpening can be a tell-tale sign. If you find yourself sharpening the blade after every few uses, it may be time to consider a new blade that retains its sharpness better and offers improved cutting performance. Always prioritize keeping your lawn mower in optimal shape by monitoring the health of the blades and replacing them as necessary for the best mowing experience.
How to Dispose of Old Lawn Mower Blades Properly
Disposing of old lawn mower blades might not be a task you think about often, but it’s essential for both safety and environmental responsibility. When blades become dull, chipped, or unusable, proper disposal is crucial to prevent accidents and to ensure that these metal components are handled in an eco-friendly manner. Here are the best practices to dispose of your old lawn mower blades safely and responsibly.
Firstly, you should never simply throw old mower blades in the trash. Instead, check for local recycling programs that accept metal. Many municipalities have designated drop-off sites or recycling centers where metal waste is collected. This is beneficial not only for the environment but also supports the economy by recycling materials for new products. Contact your local waste management authority for specific guidelines on metal disposal in your area.
If local recycling options are unavailable, consider repurposing the blades creatively. Old mower blades can be transformed into garden art or tools. For instance, they can be fashioned into garden stakes, decorative sculptures, or even unique wall hooks. This approach reduces waste and provides an opportunity to unleash your creativity. Additionally, if you’re uncertain about the safety of handling old blades yourself, a local metalworker or craftsman might even be interested in taking them off your hands.
When preparing your blades for disposal, it’s essential to ensure they are safely managed to avoid injury. Wrap the blades in heavy cardboard or thick cloth to prevent sharp edges from causing harm. Label the package clearly as “sharp metal” if it’s being stored temporarily before disposal. By taking these precautions, you ensure the safety of those who may handle the waste after you.
In essence, while disposing of old lawn mower blades may seem straightforward, it carries significant responsibilities. By following these guidelines, you’ll not only protect yourself and others but also contribute positively to the environment through recycling efforts.
Creative Storage Solutions for Mower Tools
Maintaining an organized workspace not only enhances efficiency but also contributes to safety when working with lawn mower tools. Finding innovative storage solutions can significantly streamline the process of removing and handling mower blades, ensuring you can do so quickly and without hassle. A clutter-free environment reduces the risk of accidents while allowing easy access to the necessary tools. Here are several effective ideas for creatively storing your mower tools.
One solution is to use a pegboard mounted on a wall in your garage or shed. This allows for flexible and customizable storage options. By hanging tools such as wrenches, socket sets, and even the mower blades themselves, you can easily see what you have and grab tools as needed. Consider organizing the pegboard by tool type or frequency of use, ensuring that your most-used tools are within reach. Additionally, labeled bins for small items like screws and safety gloves can prevent loss and keep everything tidy.
Another effective option is to create a tool rack using durable wood or PVC pipes. You can build a vertical rack that accommodates lawn mower blades and other longer tools like rakes and shovels. This system keeps items off the ground, preventing them from becoming damaged or lost in the clutter. It also helps protect your fingers from accidental cuts. When designing this rack, ensure it’s sturdy enough to hold the weight of the tools without tipping over.
For those who prefer compact solutions, consider investing in a mobile tool cart. These carts can store a variety of tools and be easily wheeled around your yard or workshop. You can allocate a section for mower blades, including a designated area for protective gear like gloves and goggles. This way, every time you remove the mower blades, you have immediate access to everything else you need, minimizing the time spent searching for tools and maximizing productivity.
Lastly, it might be beneficial to think outside the box by repurposing items you already own. Old dressers or shelves can be redesigned into storage units for tools. Just add dividers to keep everything organized and accessible. You can also use jars or small containers to store screws, nuts, and bolts, ensuring these small items don’t get lost in the shuffle.
By implementing these creative storage solutions, you’ll not only keep your area organized and safe but also enhance your overall lawn maintenance efficiency. When you know where your tools are and can quickly access them, removing your lawn mower blade in under 10 minutes becomes a feasible task, allowing you to enjoy your mowing experience without unnecessary delays.
Expert Advice on Lawn Care After Blade Removal
Proper lawn care after removing the mower blades is crucial for maintaining both the health of your lawn and the longevity of your lawn mower. Once the blades are off, it’s an ideal time to assess and enhance your overall lawn care routine. A well-maintained lawn mower contributes significantly to a healthy yard, and understanding your specific lawn needs can ensure your efforts yield the best results.
Taking the opportunity to thoroughly clean the underside of your mower deck is vital. Over time, grass clippings, dirt, and debris can build up, inhibiting optimal mower performance. Use a putty knife or a scraper to remove any buildup, then rinse the deck to prevent rust and corrosion. Additionally, inspect belts, pulleys, and other components for wear and replace them as necessary. This preventative maintenance extends the life of your mower and keeps it operating efficiently.
Moreover, consider doing a soil test to determine nutrient levels in your lawn. Knowing your soil’s pH and nutrient content allows you to customize your fertilization strategy effectively. This is the perfect time to apply a soil conditioner or organic fertilizer, as it supports healthy regrowth and prepares your lawn for the upcoming season. After blade removal, you can also aerate your lawn if needed. Aerating improves soil compaction and allows air, water, and nutrients to penetrate the roots more effectively.
Lastly, don’t forget to check the sharpness of your new blades before reinserting them. Sharp blades make clean cuts, which promote faster healing for grass and reduce disease susceptibility. Keep in mind that the best time to mow is typically when the grass reaches about one-third of its ideal height. By following these steps, you not only ensure your mower is in peak condition but also lay the groundwork for a healthy, vibrant lawn. Taking these measures immediately after blade removal will set you on the path to successful lawn maintenance all season long.
Frequently asked questions
Q: How do I know if my lawn mower blade needs to be replaced?
A: You can determine if your lawn mower blade needs replacement by checking for noticeable damage, such as cracks or chips, and by examining the cutting edge for dullness. If the blade tears rather than cuts grass cleanly, it’s time for a new blade. For more details, see our section on signs that your lawn mower blade needs replacement.
Q: What tools do I need to remove a lawn mower blade?
A: To safely remove a lawn mower blade, you typically need a socket wrench set, a blade removal tool (if available), and safety gloves. Always ensure you have the right sizes to fit your mower’s bolt. Detailed instructions can be found in our section on choosing the right tools for blade removal.
Q: Why is it important to remove lawn mower blades regularly?
A: Regularly removing and maintaining lawn mower blades is important because it ensures optimal cutting performance and prolongs the lifespan of the mower. Dull or damaged blades can lead to uneven cuts and stress the mower engine. For maintenance tips, check our cleaning and maintenance section.
Q: Can I use any type of oil when reattaching lawn mower blades?
A: It’s advisable to use a light machine oil or a specific mower blade lubricant when reattaching lawn mower blades. This helps to prevent rust and ensure smooth operation. For secure attachment tips, refer to our section on tips for reattaching mower blades securely.
Q: How do I dispose of old lawn mower blades safely?
A: To safely dispose of old lawn mower blades, wrap them in heavy cardboard or newspaper and secure them before placing them in the trash. Check local regulations for specific disposal guidelines, as some areas might have recycling programs for metal. More disposal methods are covered in our disposal section.
Q: What safety precautions should I take before removing a lawn mower blade?
A: Before removing a lawn mower blade, ensure the mower is turned off and unplugged (if electric). Wear safety gloves and goggles to protect against sharp edges and debris. For a comprehensive approach to safety, see our section on safety precautions before starting the process.
Q: What could happen if I improperly remove a lawn mower blade?
A: Improperly removing a lawn mower blade can lead to personal injury or damage to the mower. If the blade is overtightened or not securely attached, it may become loose during operation, causing accidents. Learn more about common mistakes to avoid during blade removal in our article.
Q: How long does it typically take to remove a lawn mower blade?
A: Removing a lawn mower blade usually takes less than 10 minutes if you have the right tools and follow the proper steps. This includes ensuring safety and preparation. For a detailed step-by-step guide, visit our section on the step-by-step process for removing lawn mower blades.
Wrapping Up
Now that you know how to safely remove your lawn mower blade in under 10 minutes, you can maintain your equipment more effectively and efficiently. Remember, taking a little time to perform this important maintenance task can enhance your mower’s performance and longevity. If you have any lingering questions about lawn mower maintenance or troubleshooting, check out our comprehensive guides on lawn mower care tips and common mower issues.
Don’t wait-get started today and ensure your lawn mower is always in top shape! For more helpful lawn care tips and product recommendations, subscribe to our newsletter and join our community of gardening enthusiasts. Your perfect lawn is just a few well-maintained lawn mower blades away! Feel free to share your thoughts or any experiences in the comments below; we love hearing from you!